


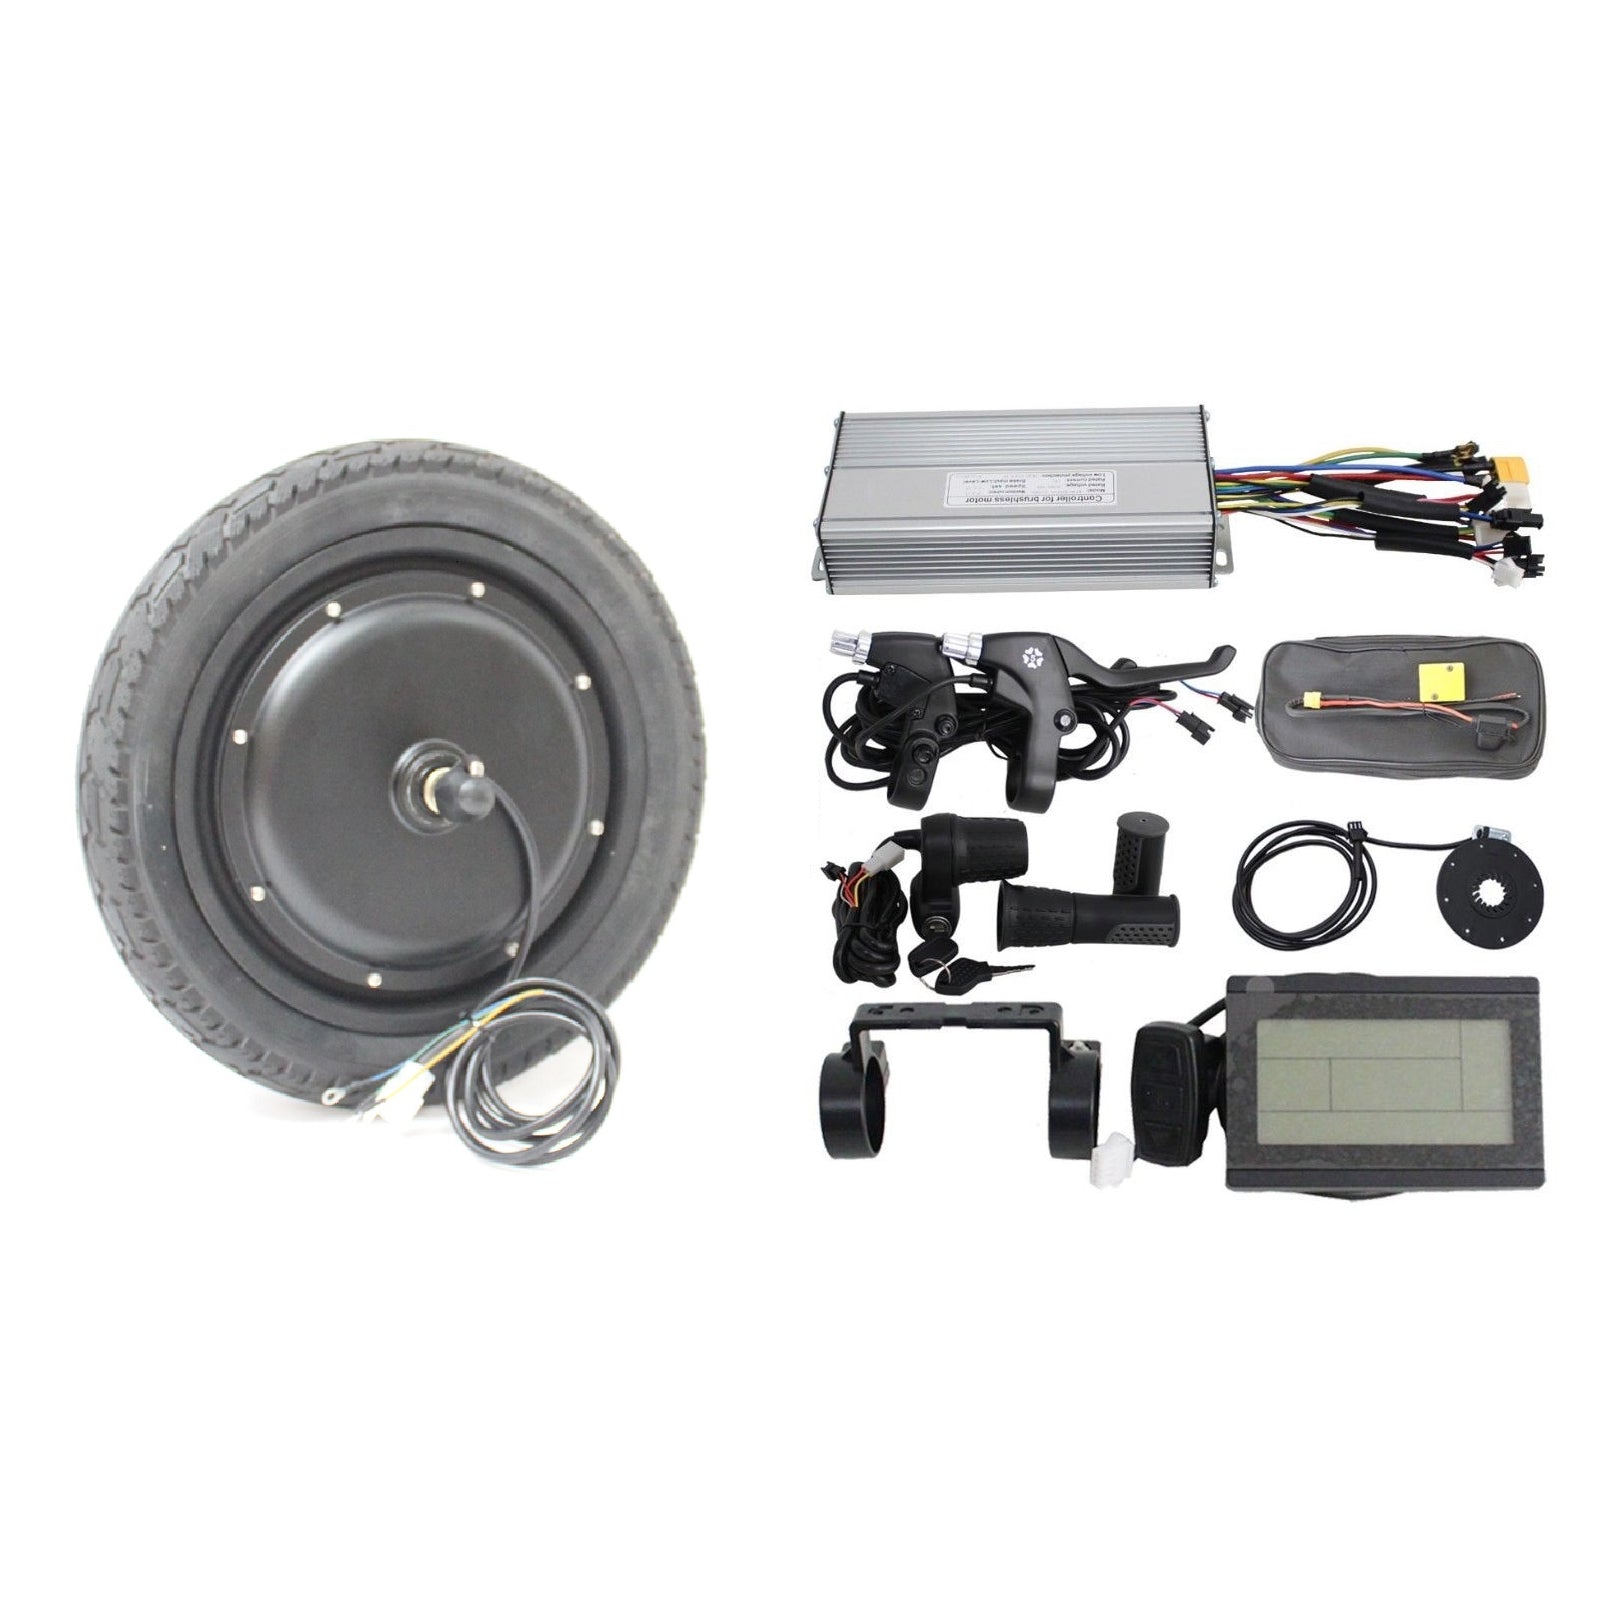
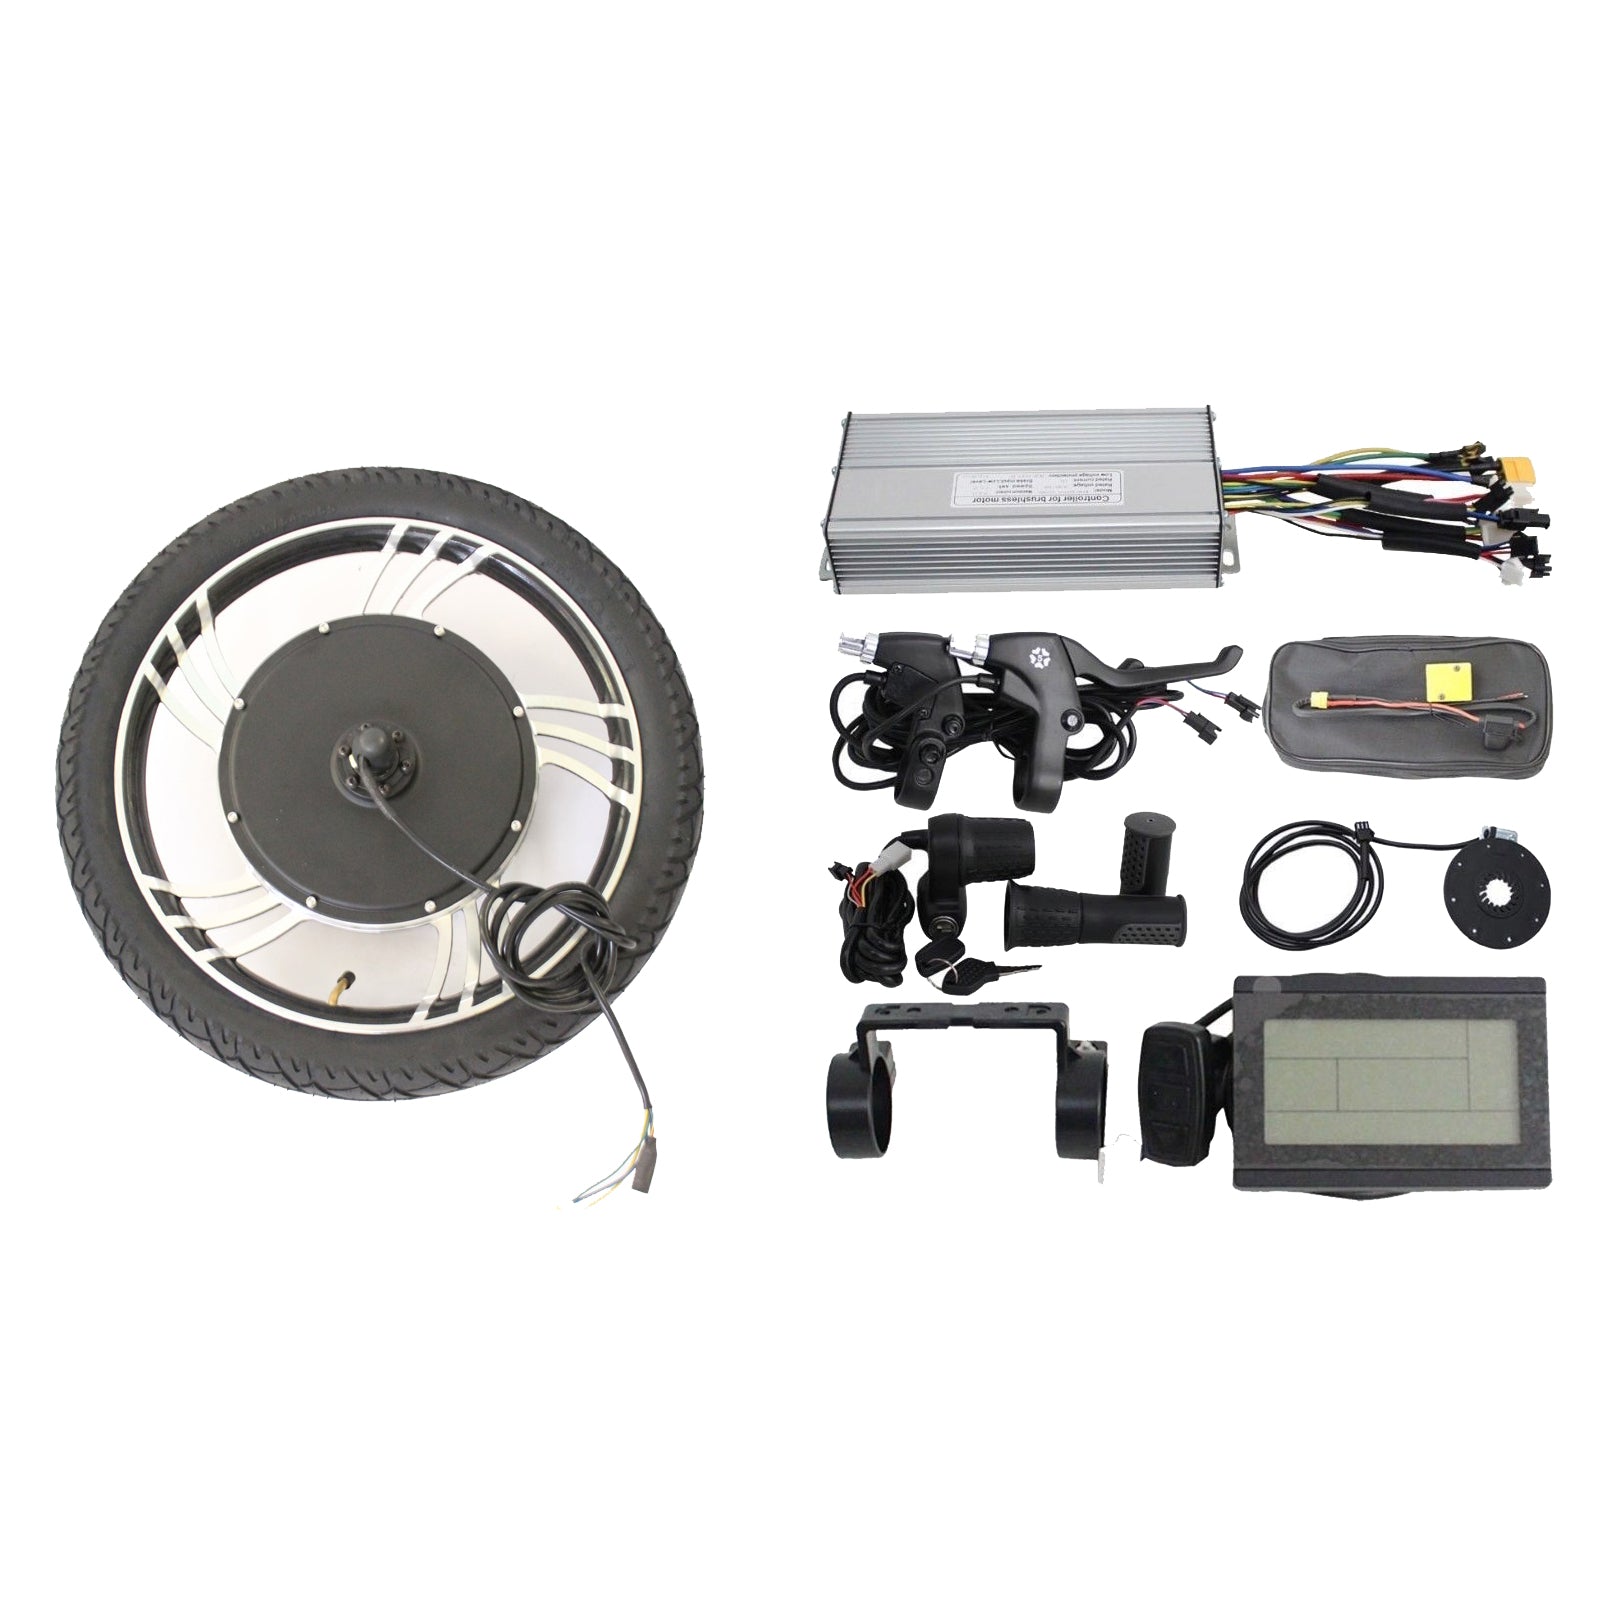
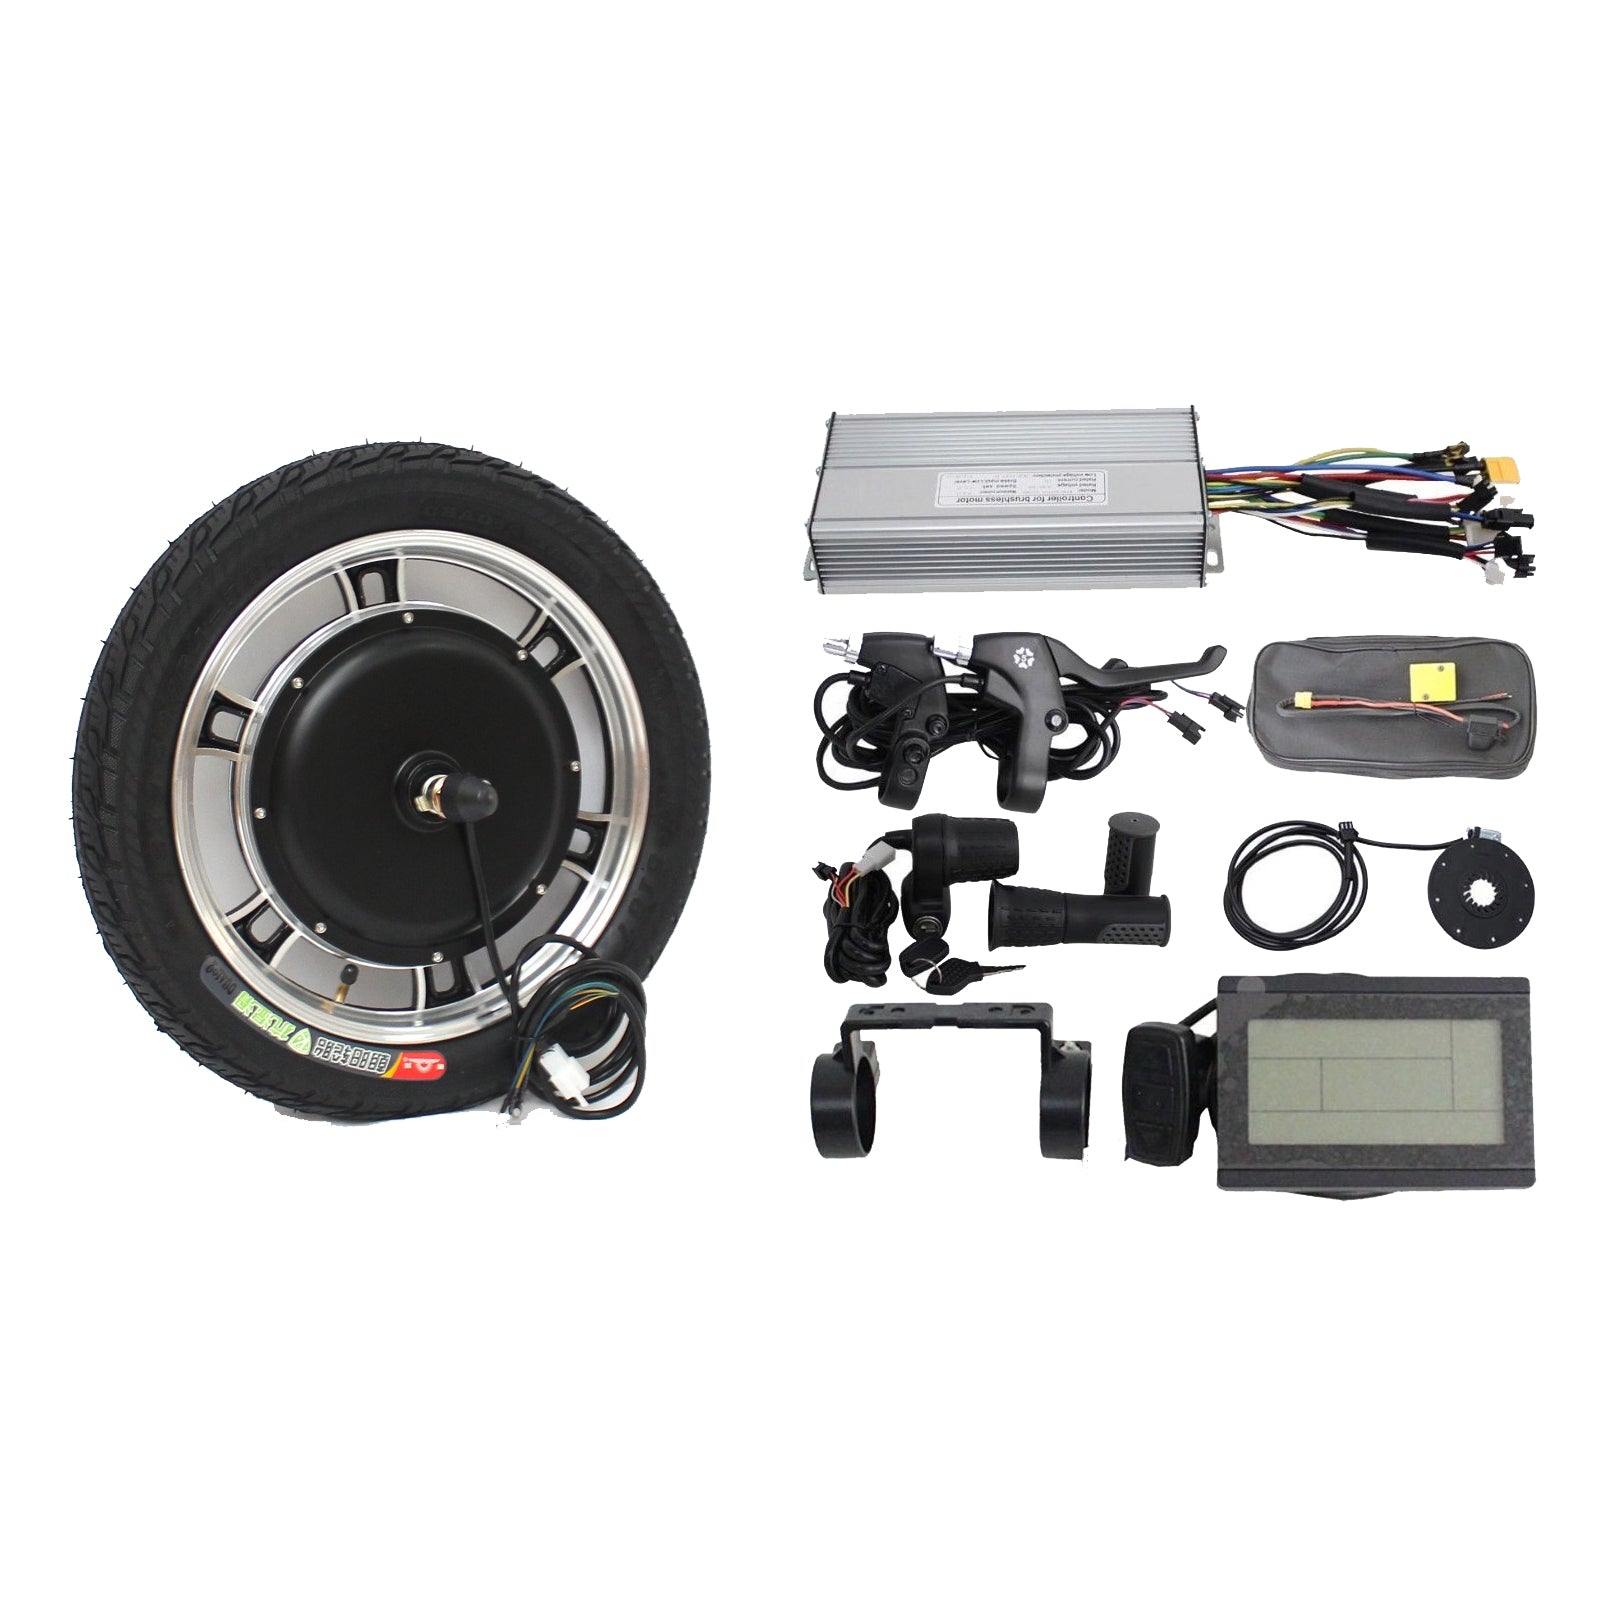
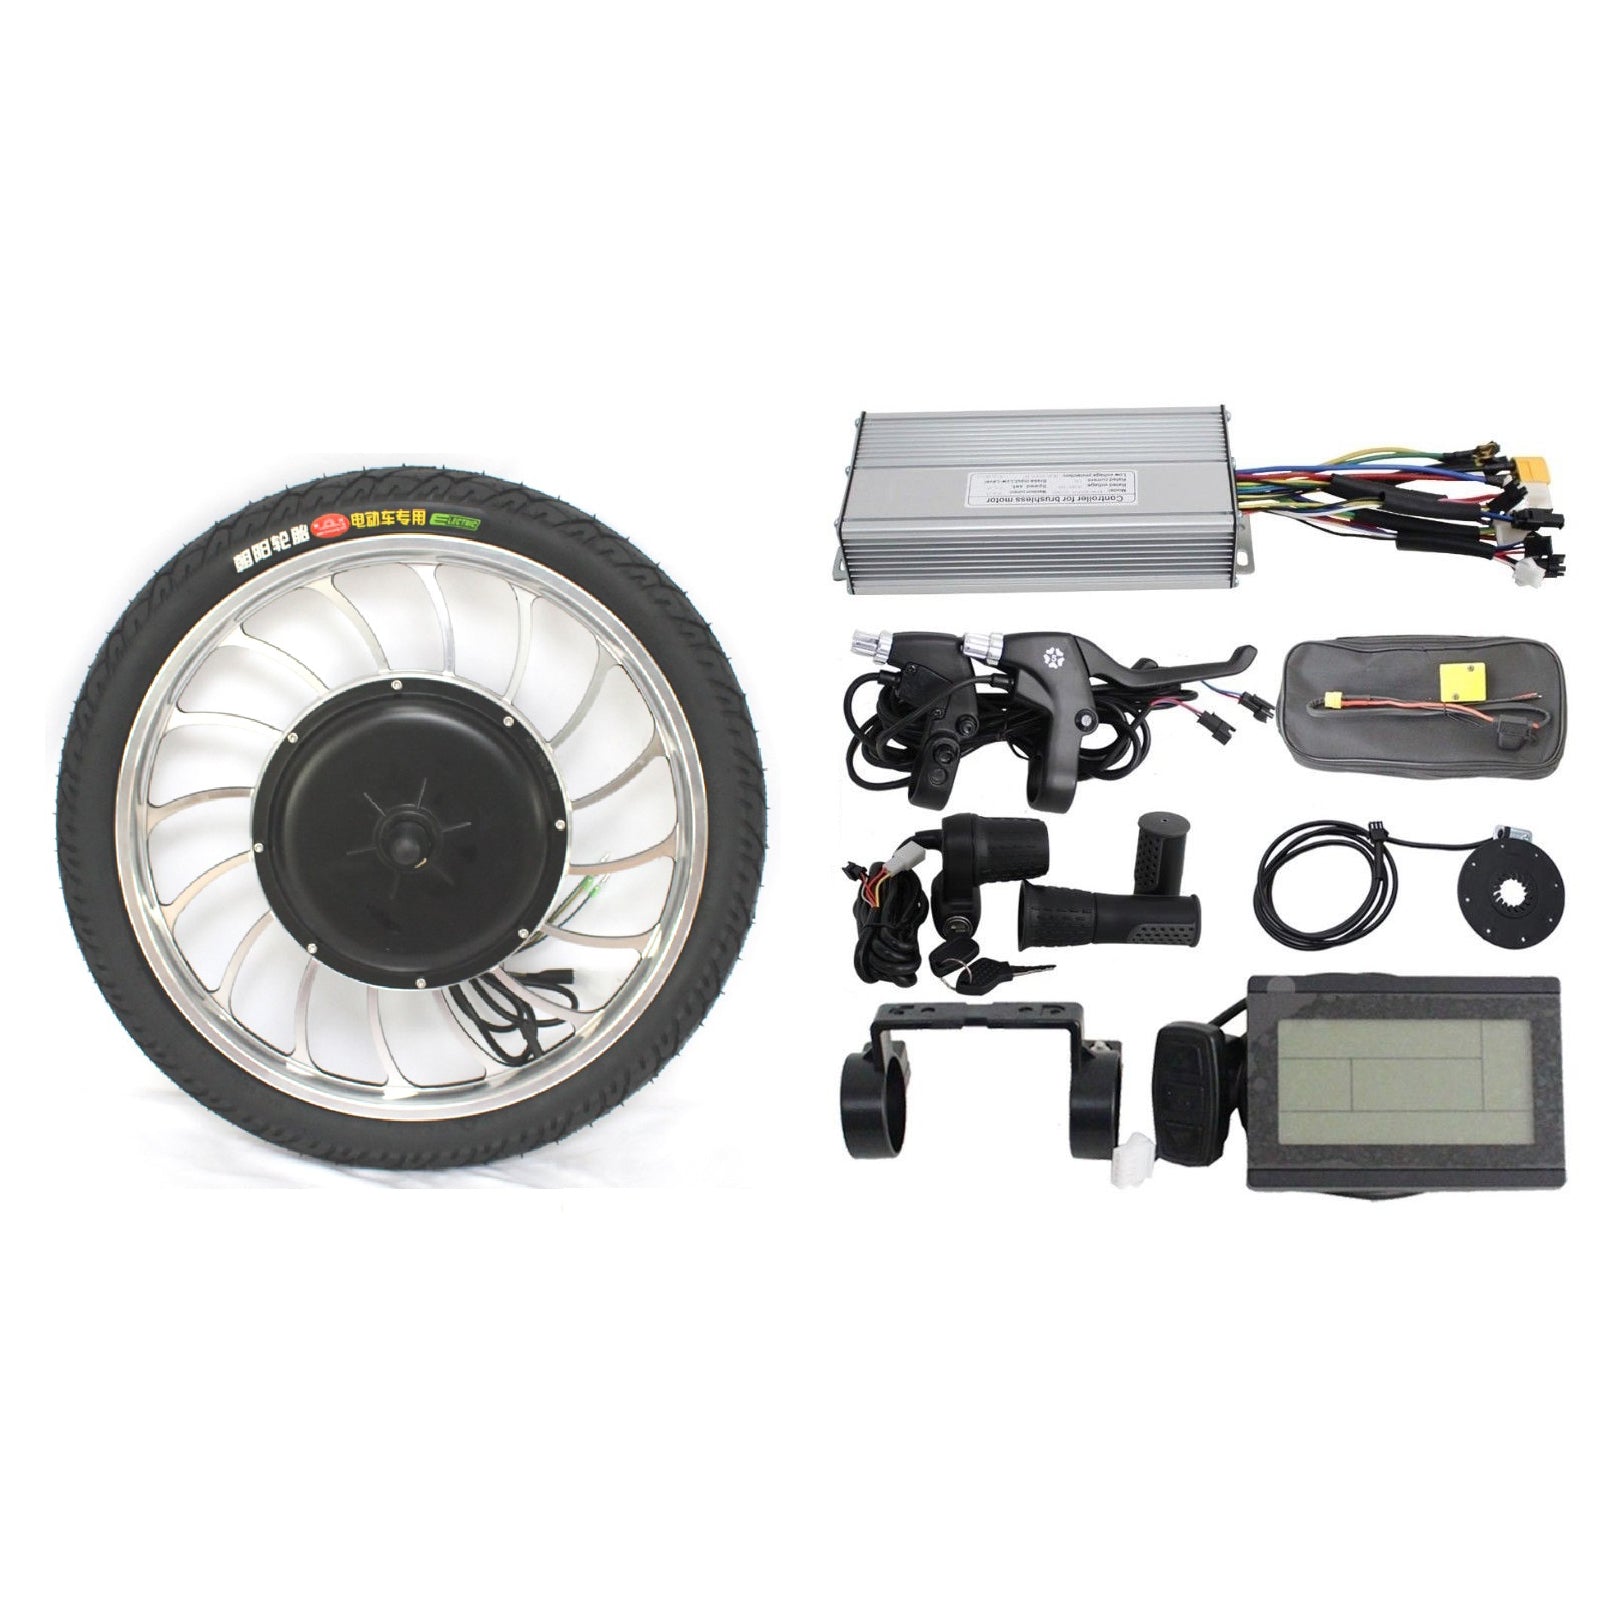

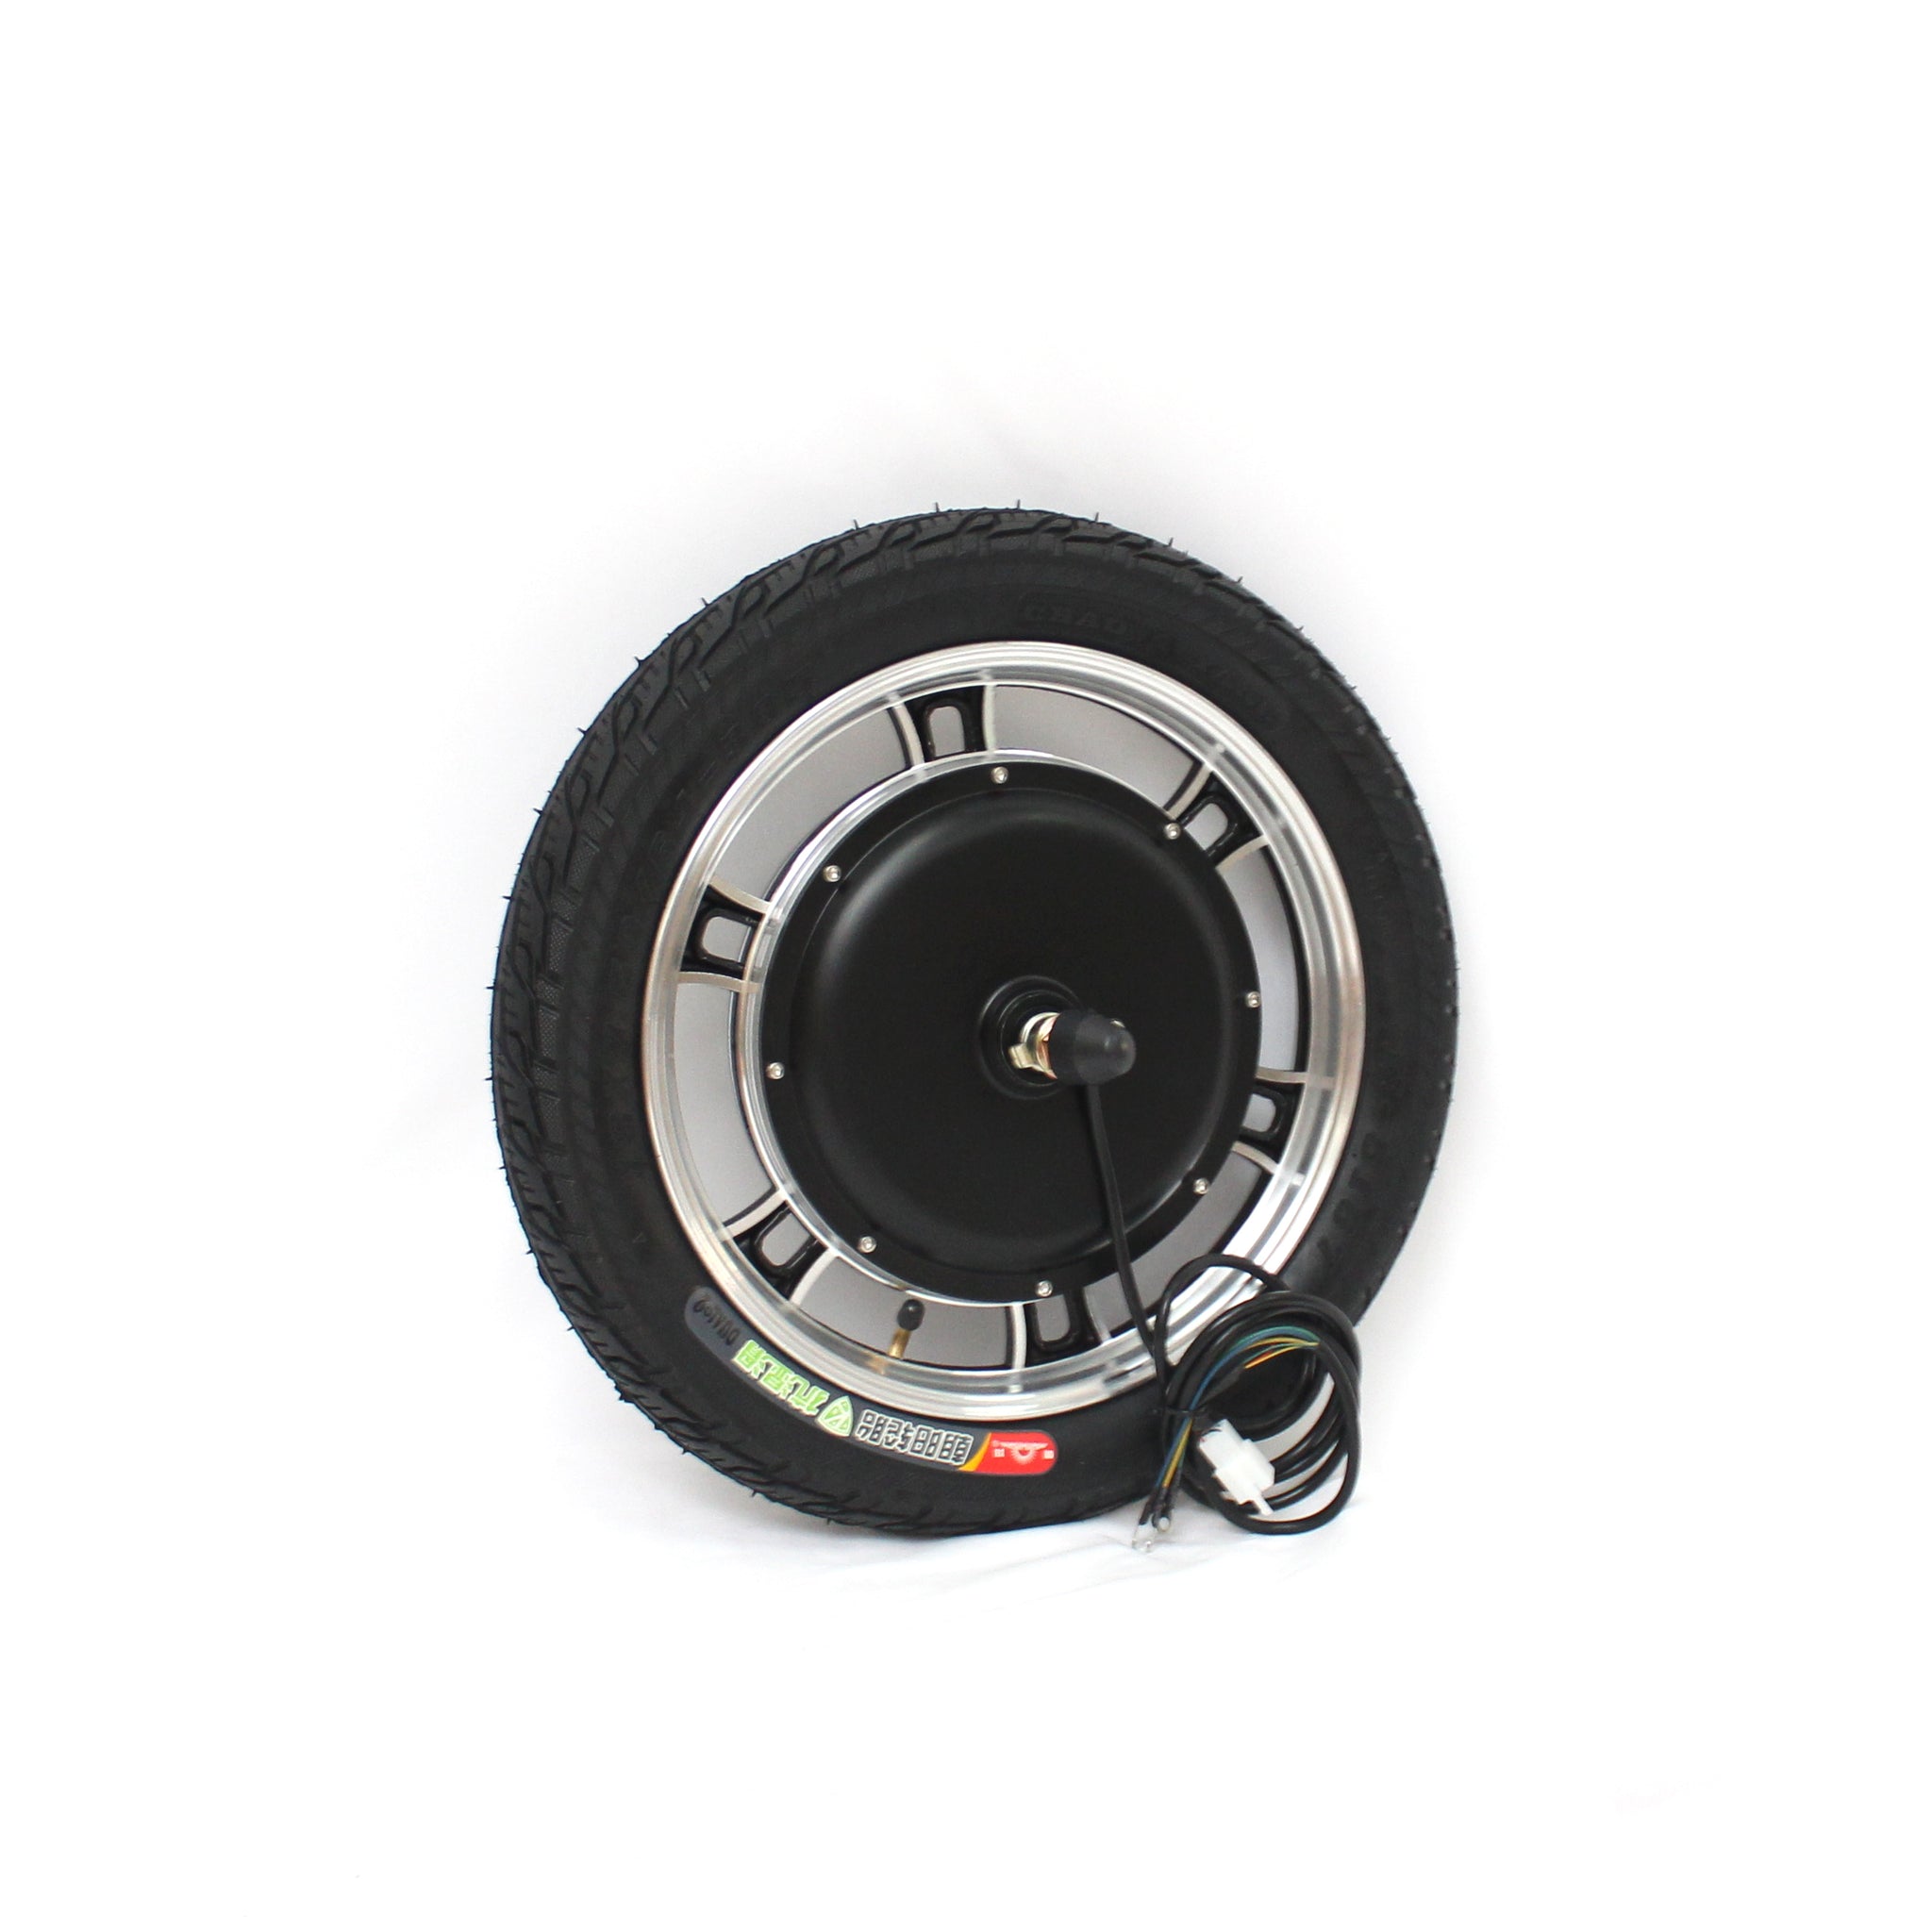
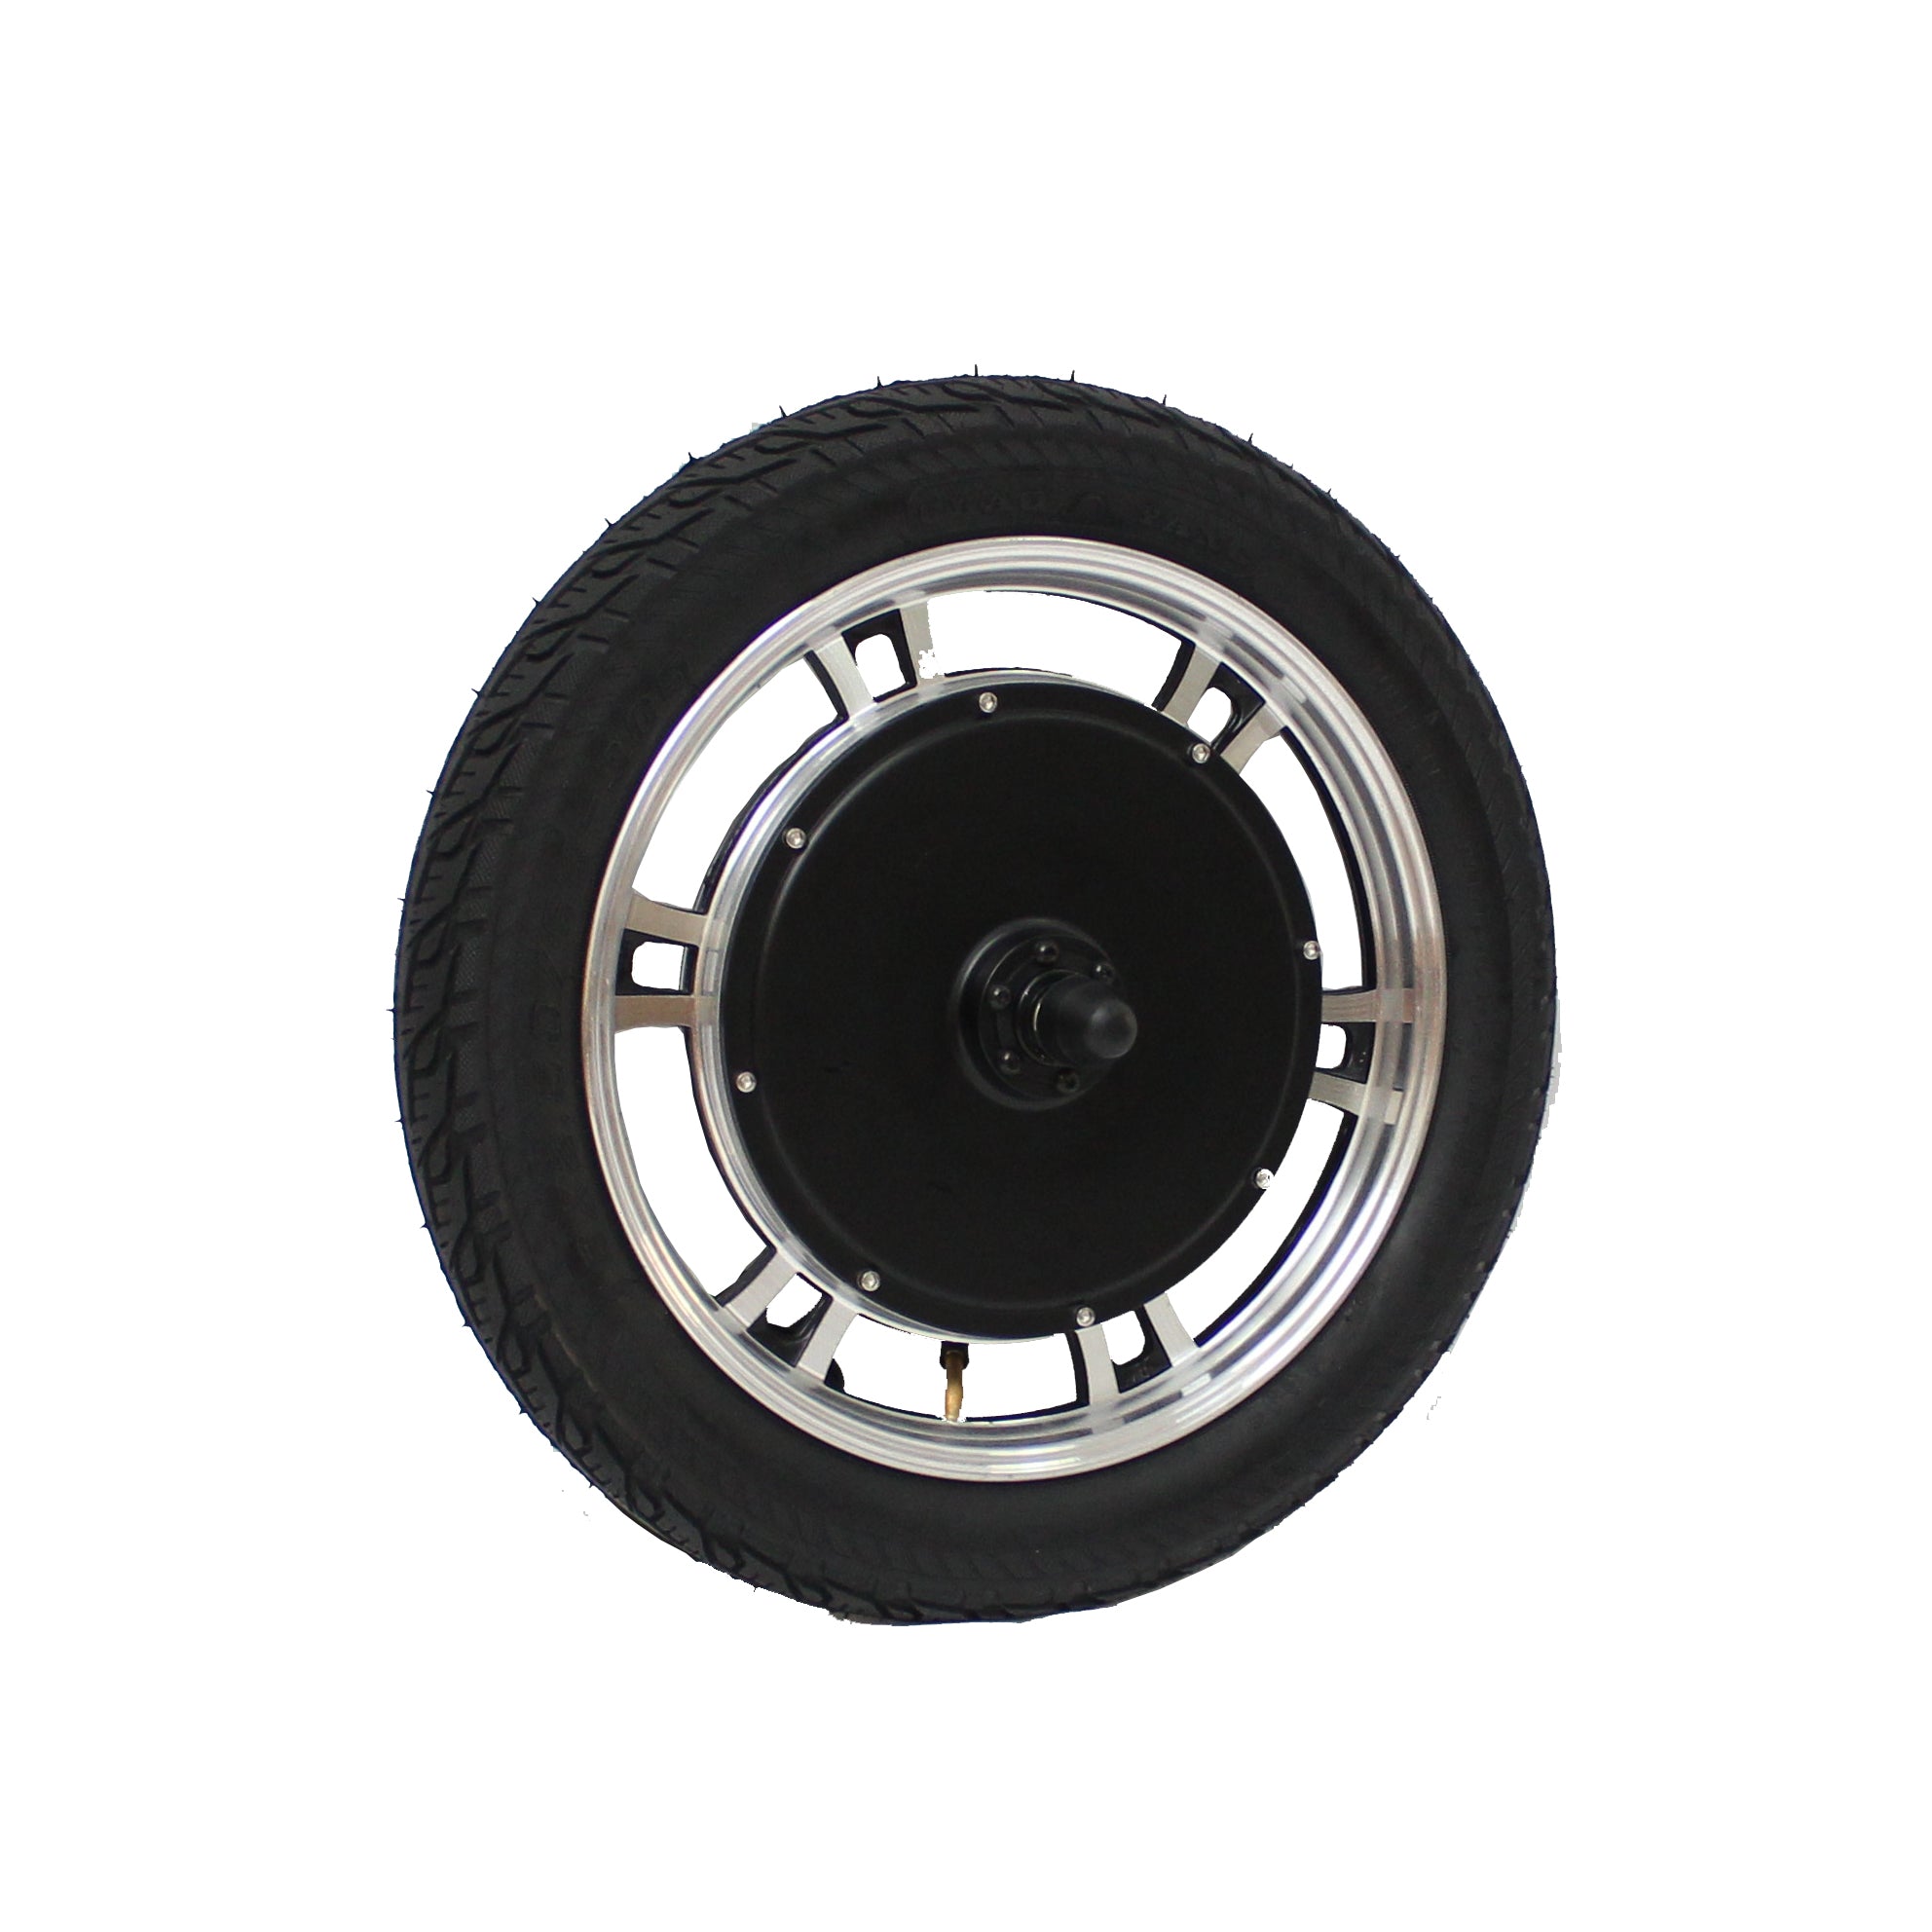
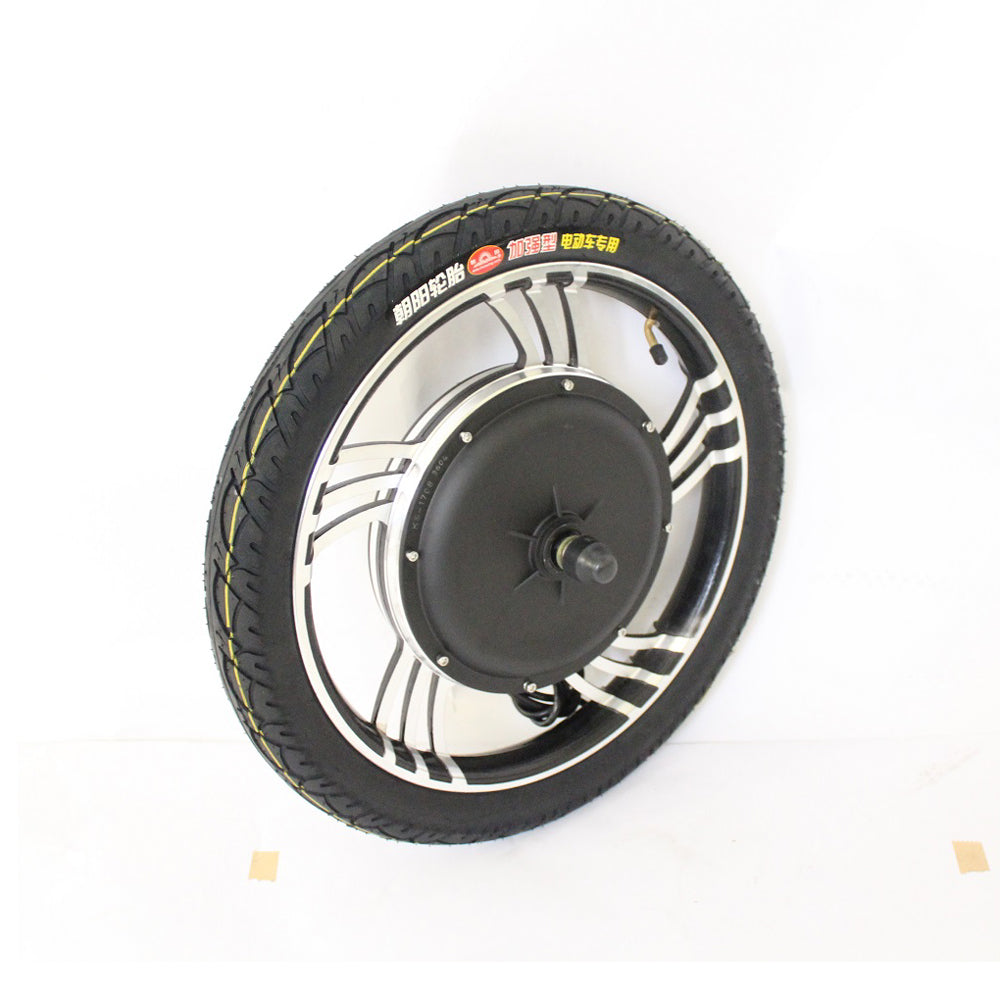
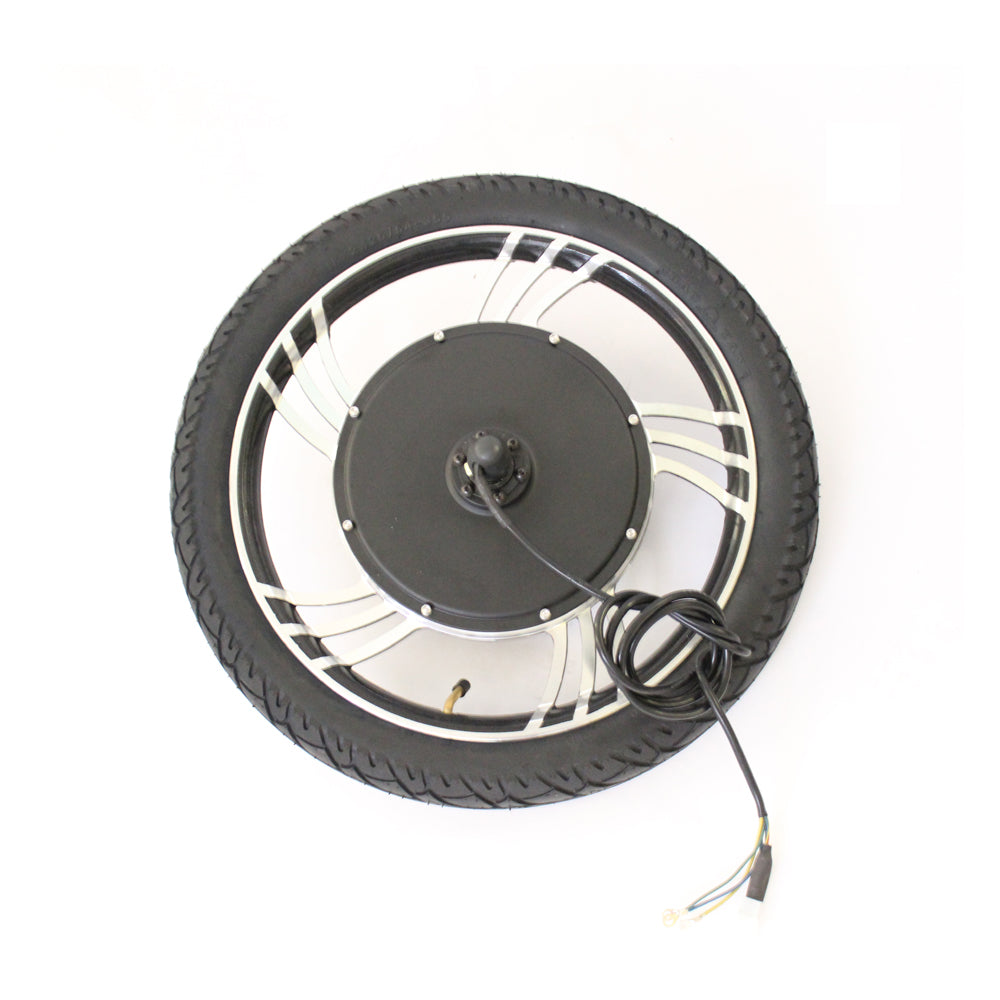
36V 750W 48V 1000W eBike Integral Front Wheel Conversion Kits: 14", 16", 18", 20"
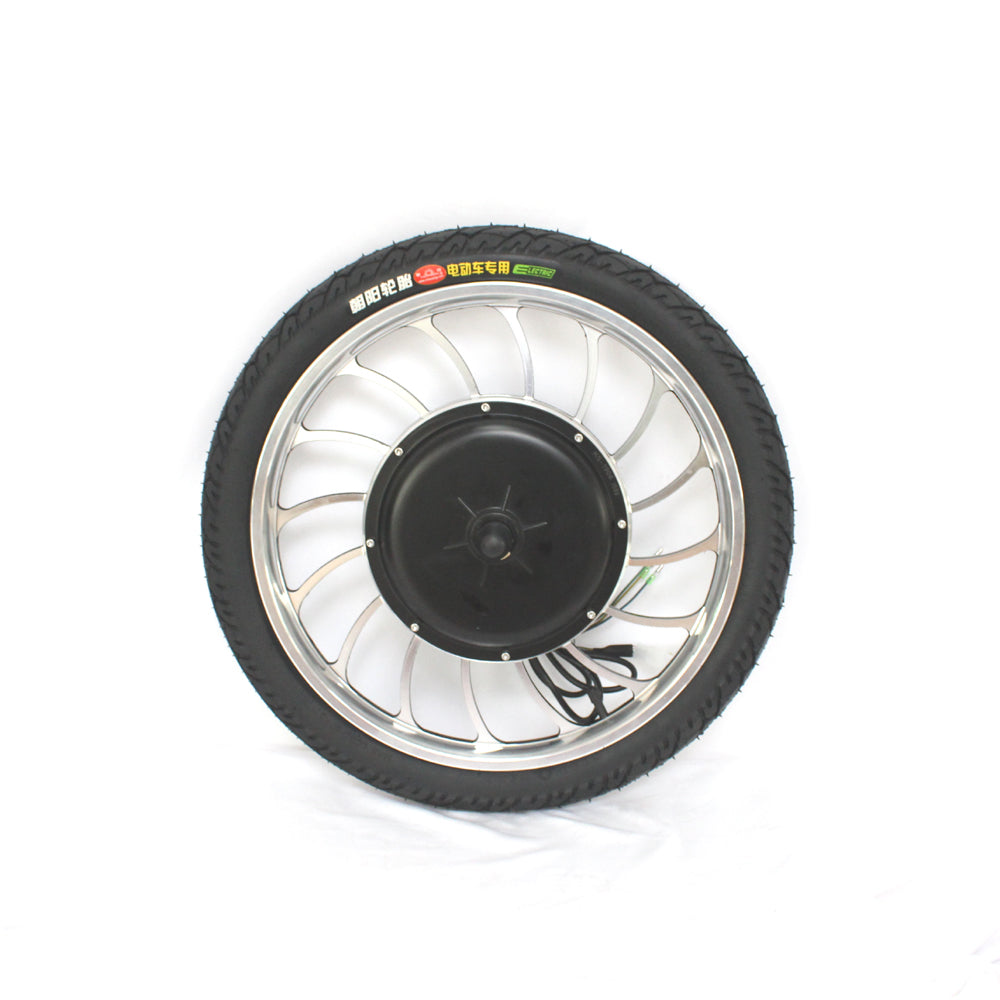
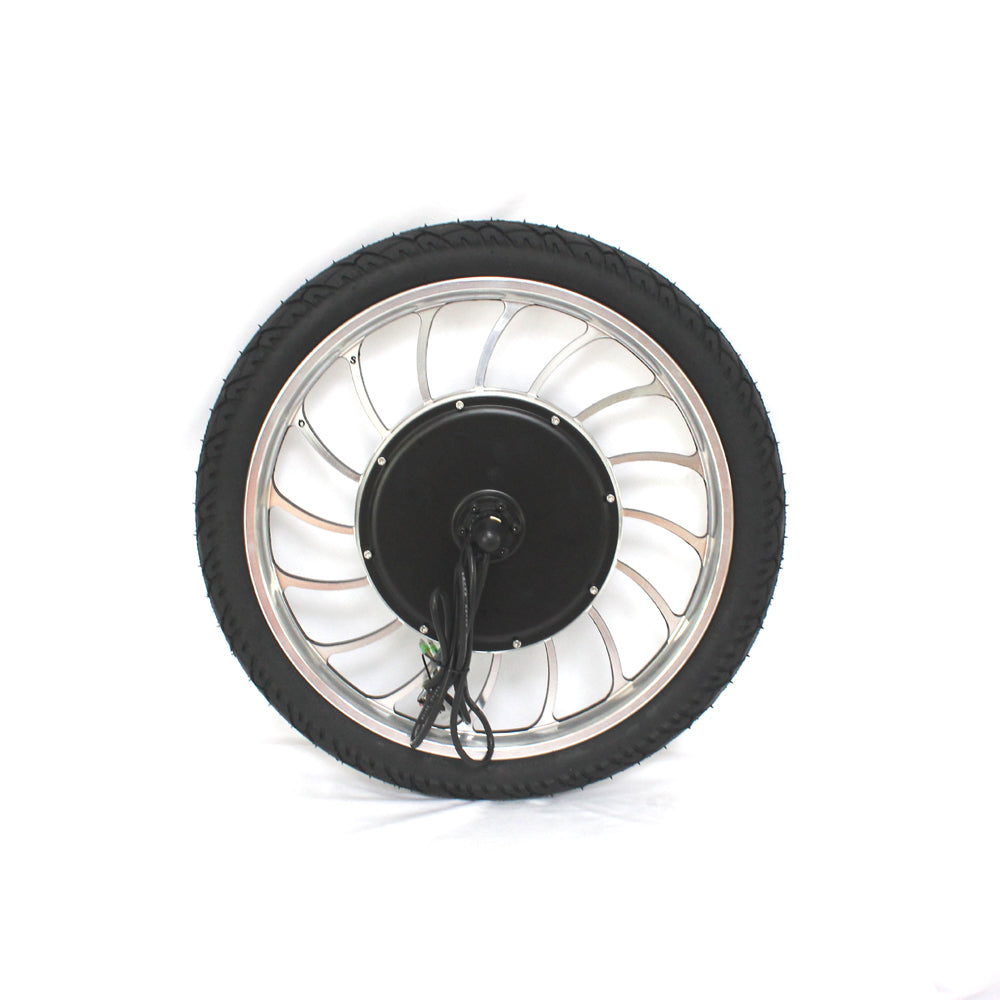
36V 750W / 48V 1000W 14"/16"/18"/20" Integral Front Motorized Wheel
Tire and tube installed
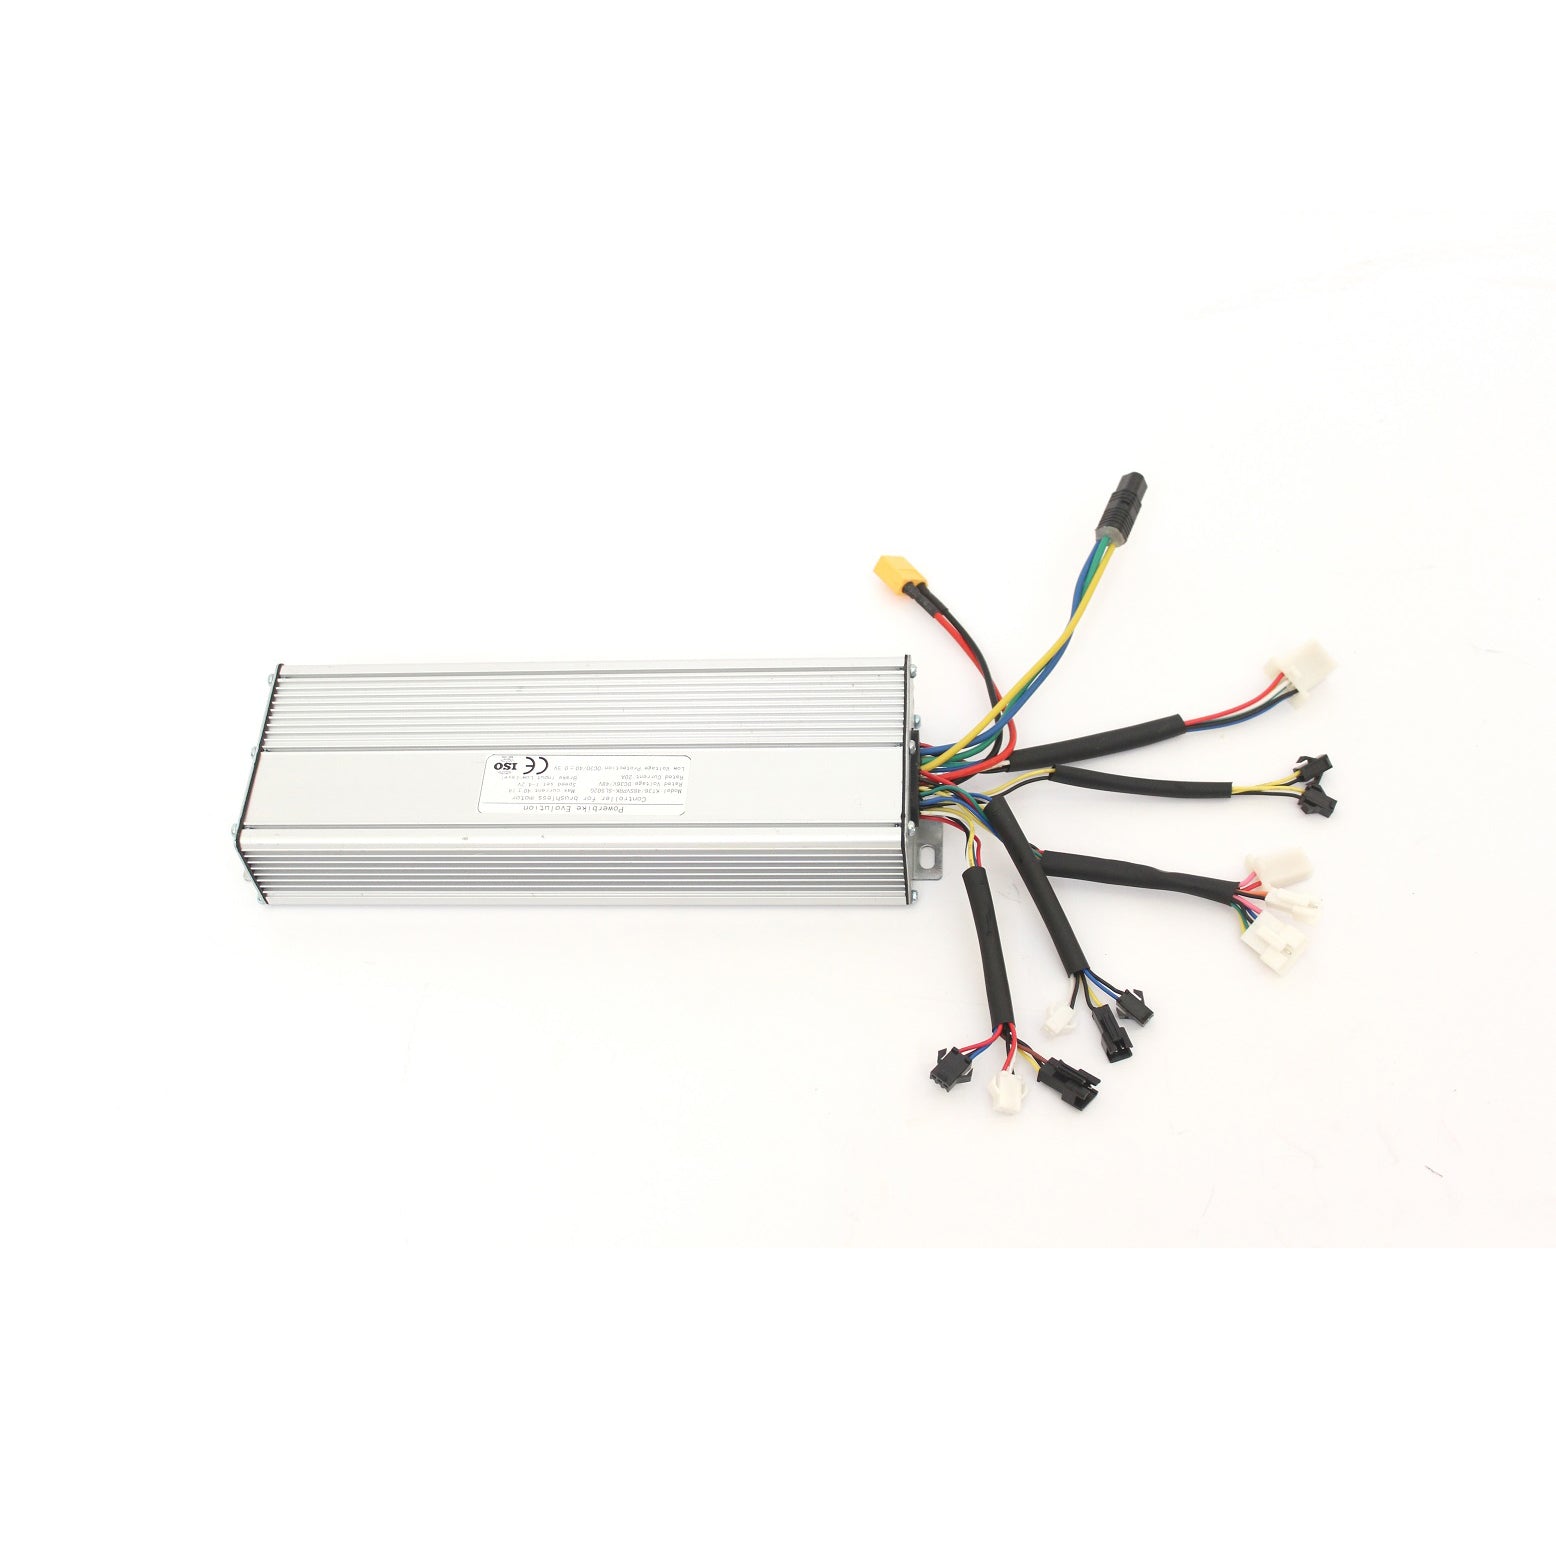
36V/48V 30A 12 MOSFET Controller
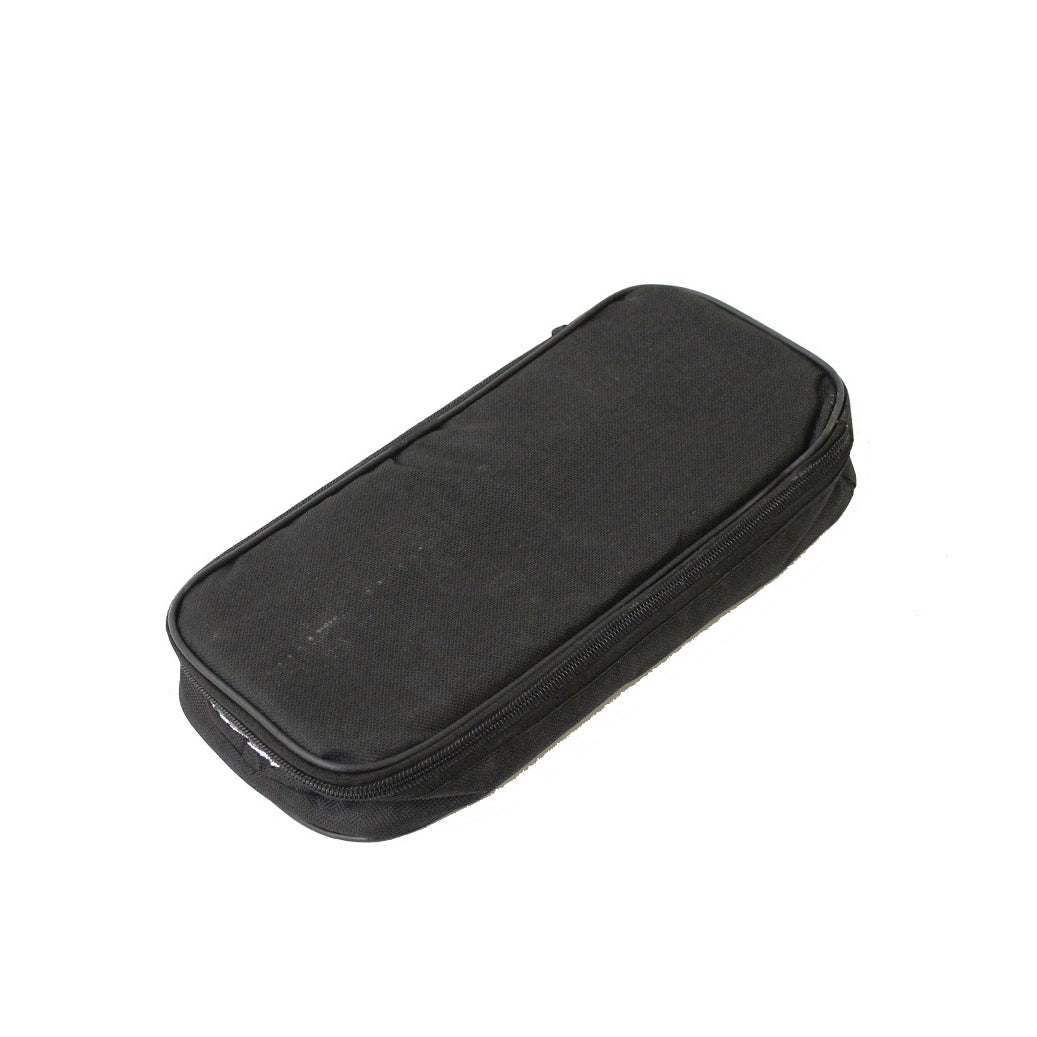
Controller Bag
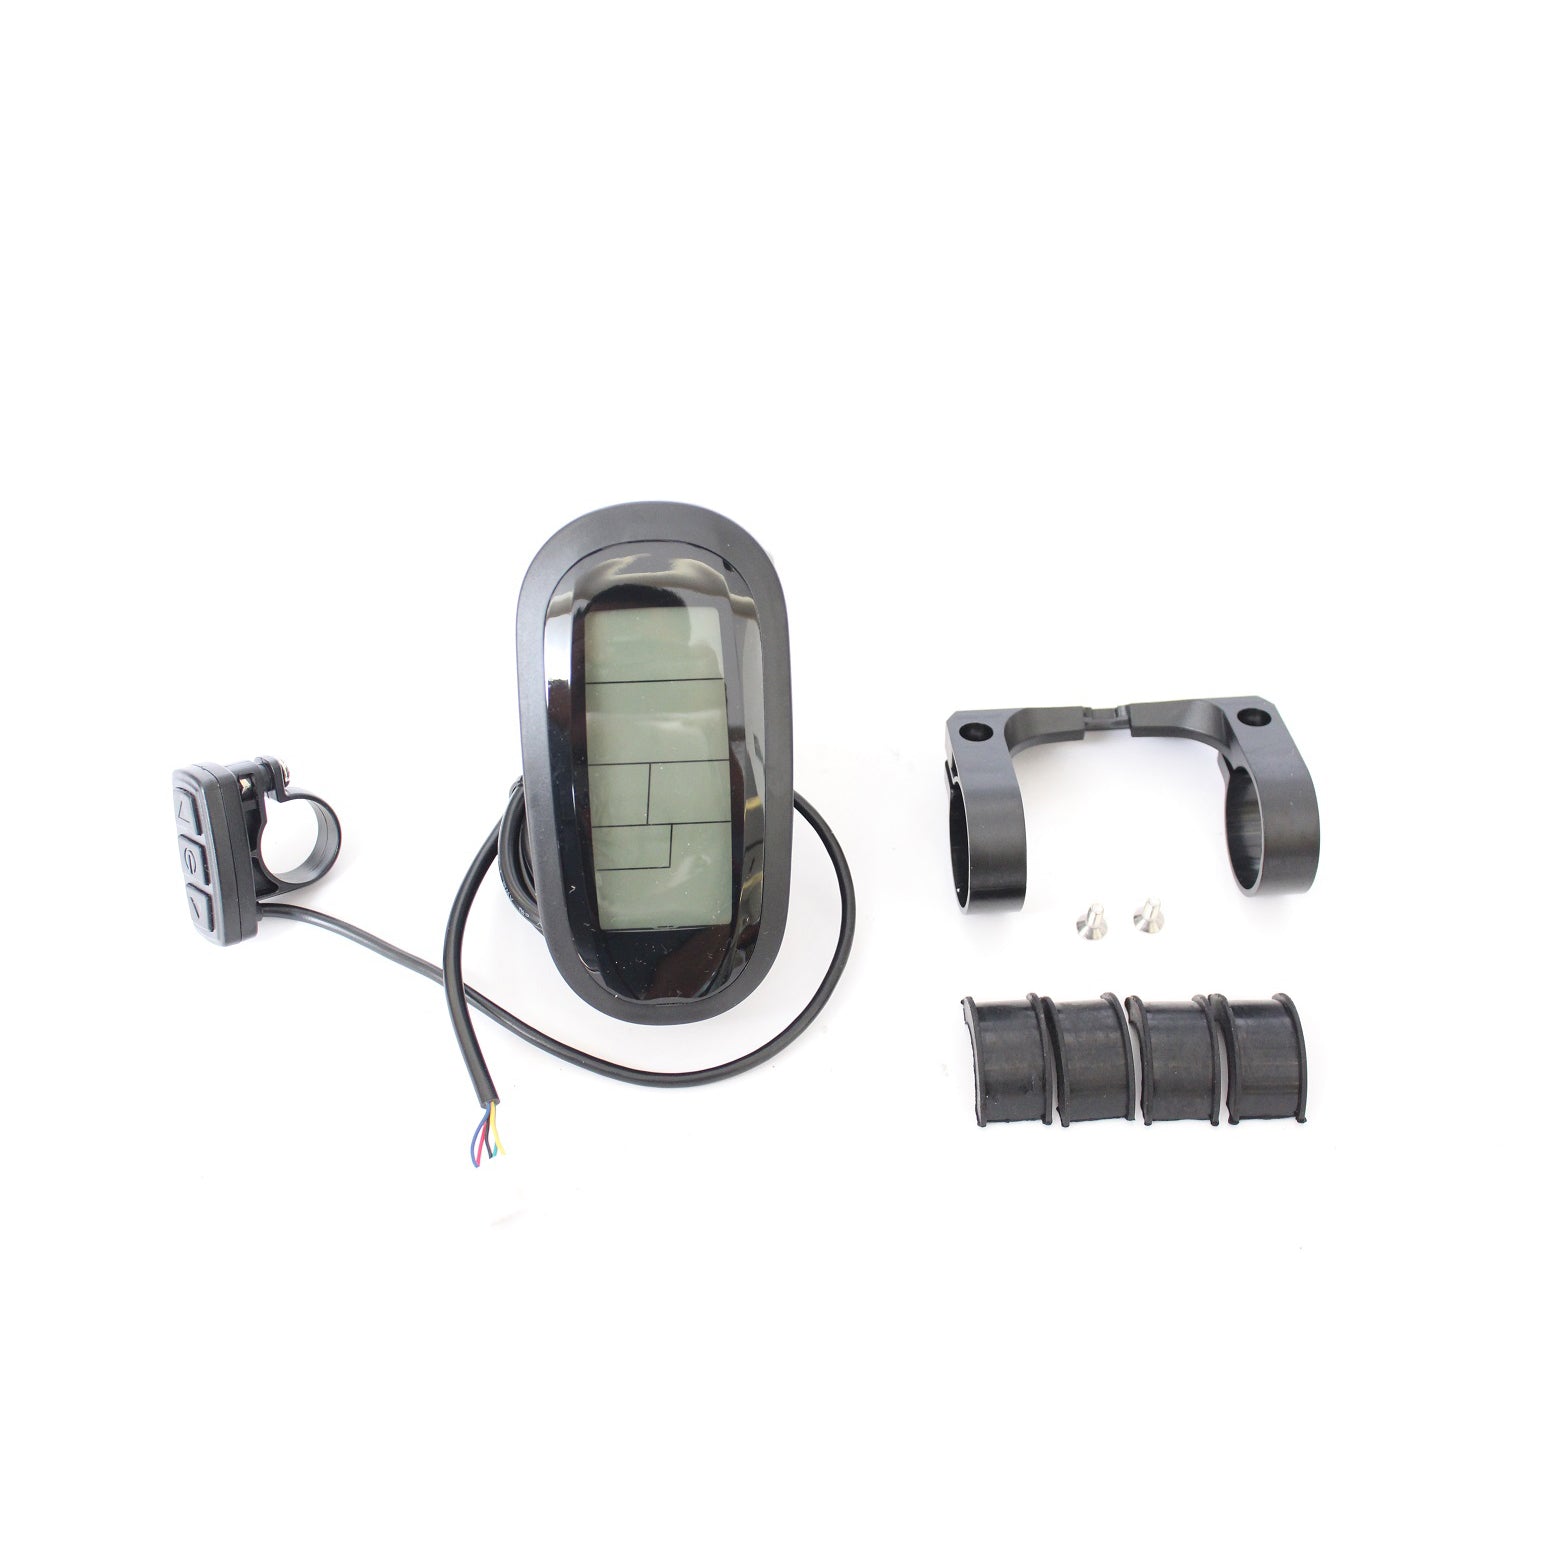
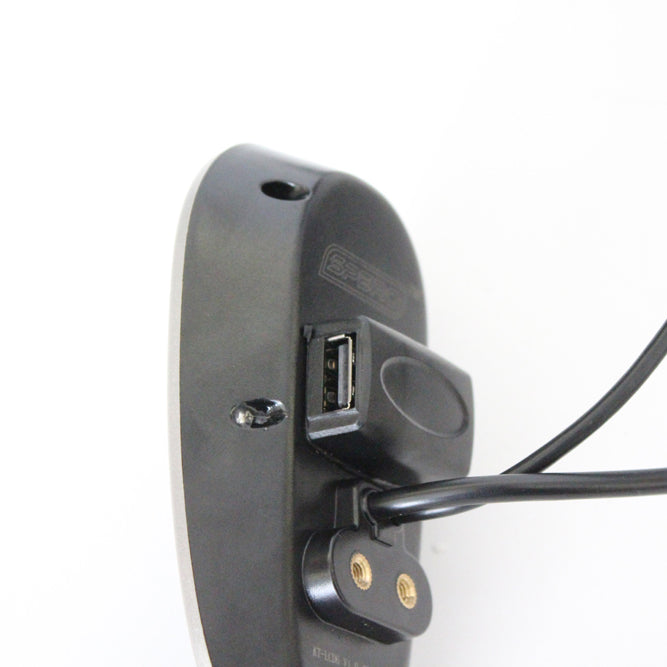
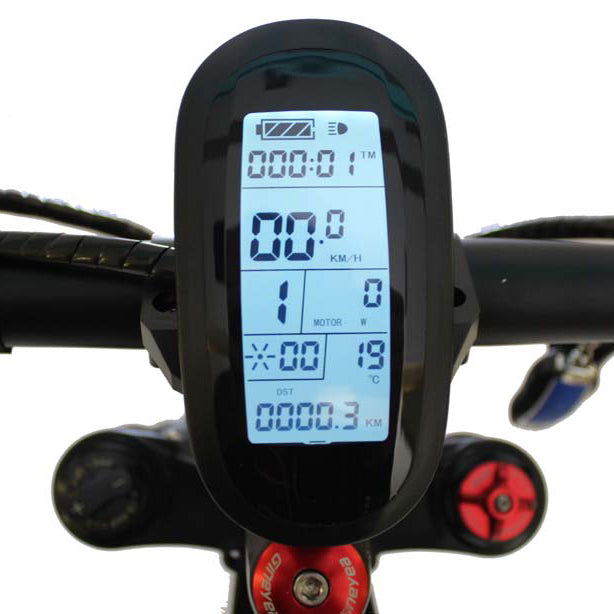
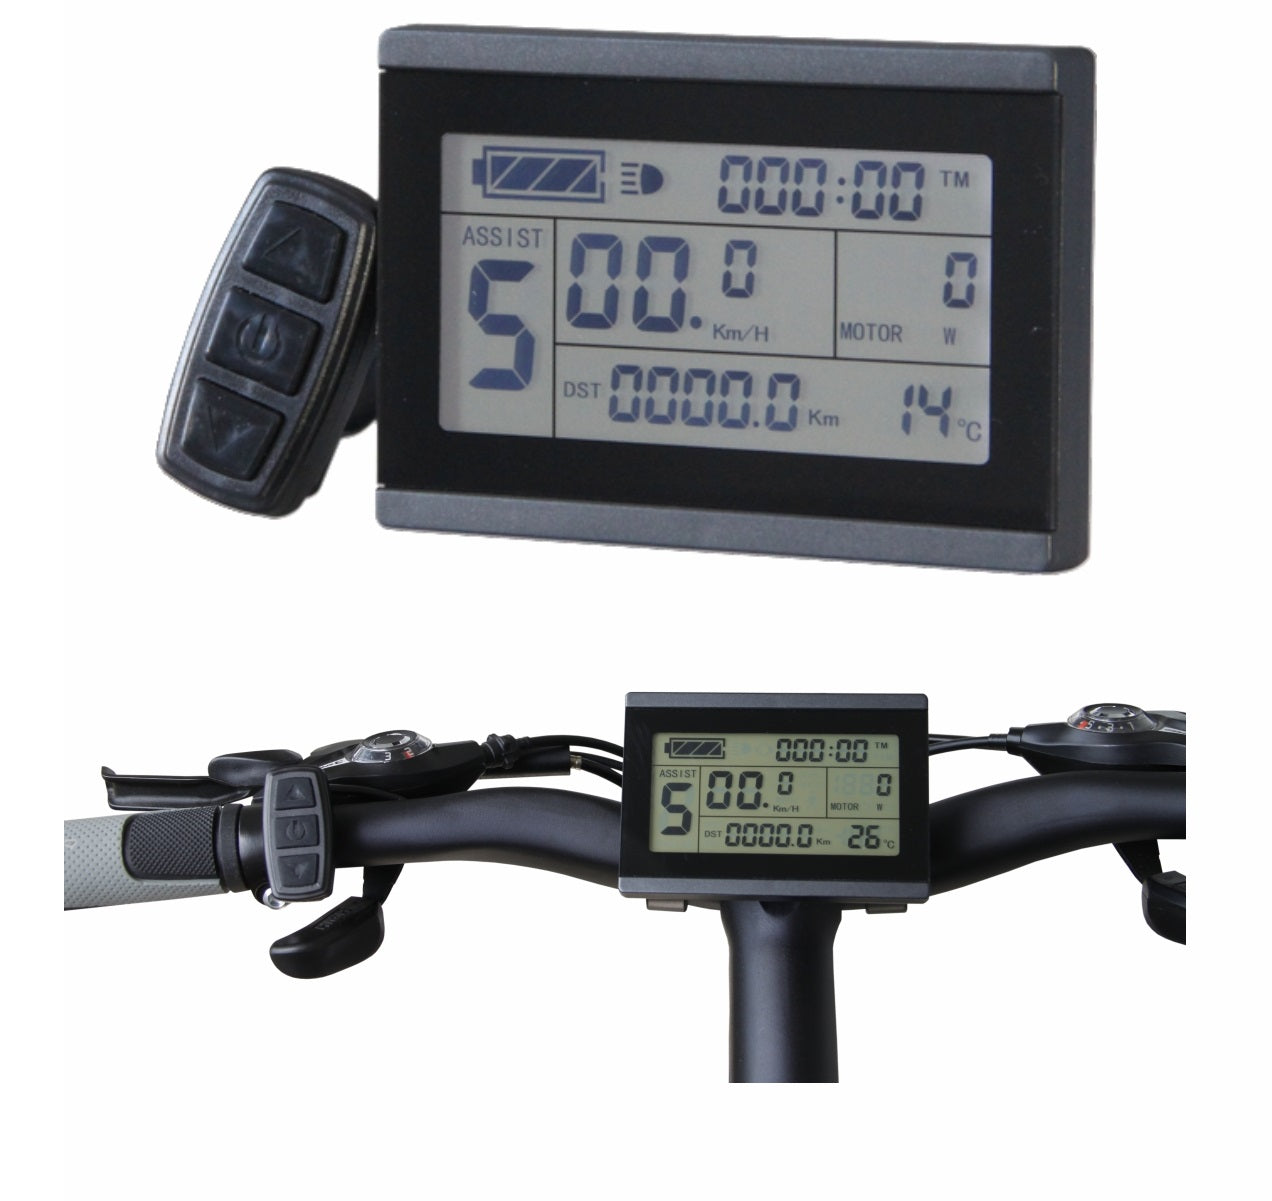
LCD3 (without USB) / LCD6 Display (with 5V USB Port) / LCD8HU Colorful Display (with 5V USB Port) / LCD8SU Colorful Display (with 5V USB Port)
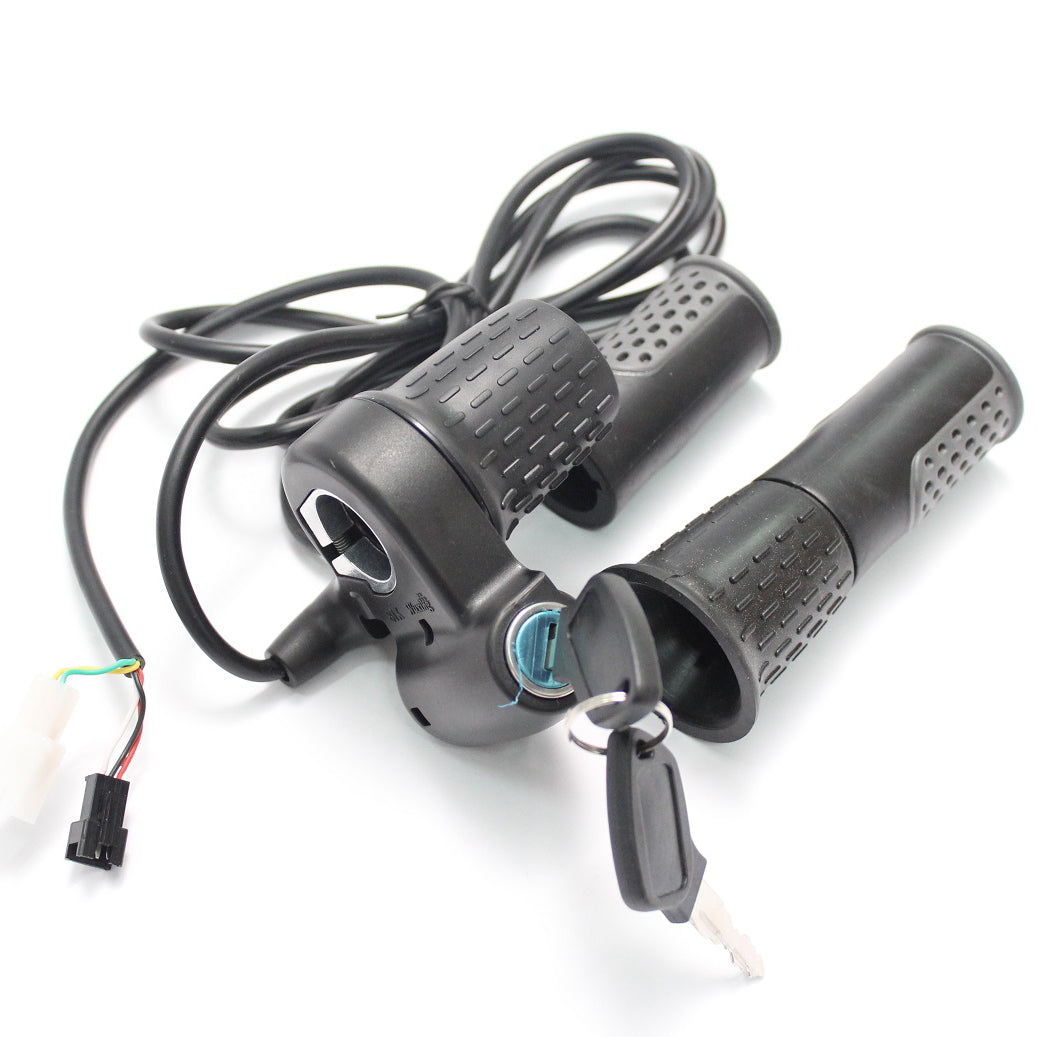
Half-bar Twist Speed Throttle with Electric Key Lock 2ea. Handlebar Grips
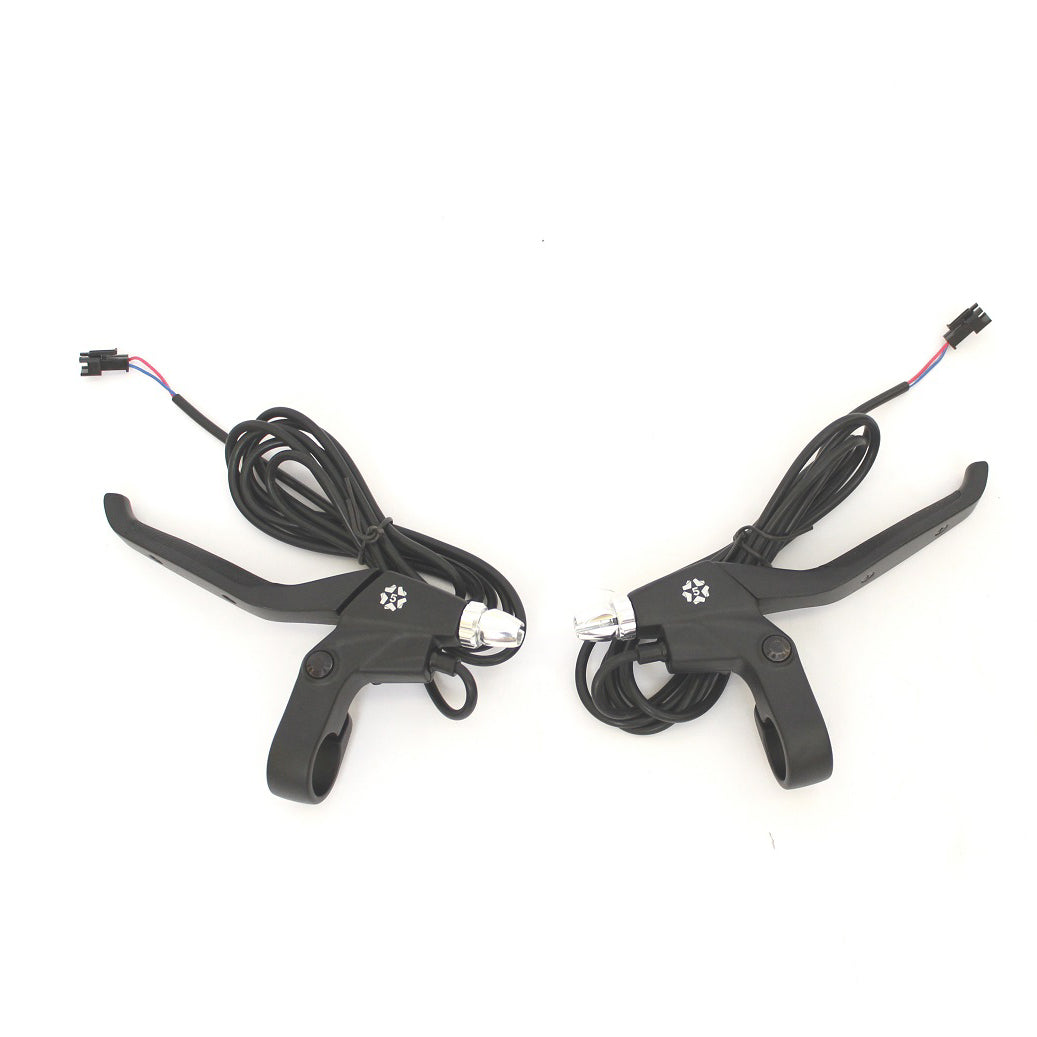
Brake Levers (Left and Right)
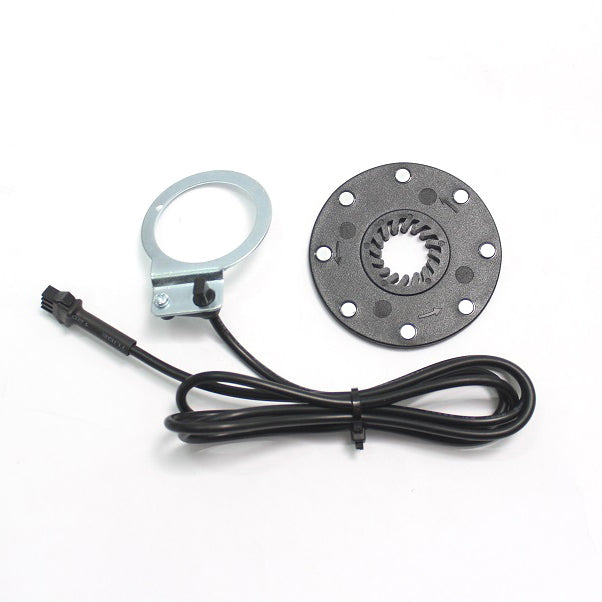
Pedelec Sensor (PAS)
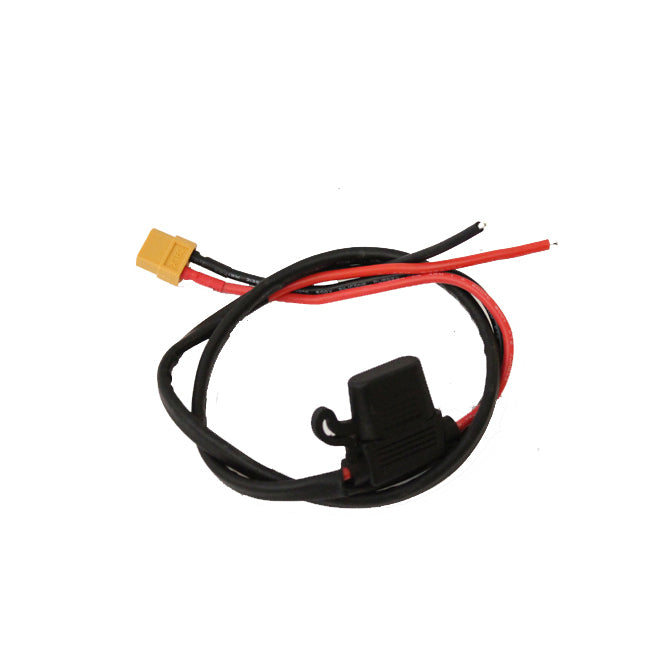
Battery Connecting Cable
Motor Specification:
1) High Motor Efficiency: max 88.7% (Save Power)
2) Torque: max torque 25 N.m.
3) RPM: max 420
4) Speed: 0-45 km/h (different wheel size, road & weather condition and rider's weight will have different speed)
5) Hub Width (dropout): 100mm Front Wheel hub motor
6) Support standard 6-hole type disc brake
7) Front Integral Wheel
Controller Specification:
1) 36V/48V 30A 12 MOSFET Controller
2) Rated Voltage: DC36V or 48V universal
3) Rated Current: 15A
4) Max Current: 30 +/- 1A
5) Speed set: 1-4.2V
6) Brake Input: Low Level
7) Low Voltage Protection: DC30/40V +/- 0.5V
8) Compatible with LCD Display or without Display (need to plug LCD jumper connector)
9) Size: 194x83x41mm
LCD Specification:
1) 24V, 36V or 48V universal
2) Function: 5-speed level PAS, turn on/off PAS, speed display, speed limit, Cruise, 5-speed level throttle, max current setting, optional Regenerative braking function
3) With press key button: Up, Down, Power
4) 5V USB output, can charge mobile phone
5) Size: 122x63x31mm
Installation Guidance:
1) Unscrew the existing rear wheel screws, remove your rear wheel;
2) Install the motorized wheel and fasten screws;
3) Attach LCD, Brake lever and throttle;
4) Put Controller at suitable position and connect all wires.
5) Turn on battery, throttle key and LCD, set correct value from LCD
Correct wheel size setting: according to your wheel size
Correct max speed setting: set it at max value 99
Correct P1-P5 setting: P1=46,P2=0,P3=0,P4=0,P5=12
Save all value and restart LCD display
FAQ:
1) Does your rear wheel support disc brake?
Yes, our motor wheel support standard 6-hole type disc brake. If you want to install hydraulic disc brake, we recommend you to put a 5mm washer between disc brake rotor and motor (to add distance between motor and rotor to put thicker caliper)
2) Why can't turn on power
Please kindly check whether battery poles connect with controller is correct;
Please kindly check whether all connection correct and tight
Please kindly check whether you connect electric lock plug and turn on throttle key
Please kindly check whether you turn on LCD Display
3) Why after I turn on power and turn throttle, motor doesn't work
Please kindly check whether all power already turned on
Please kindly check whether throttle connection is correct (Throttle is Red/Back/Blue wires)
Please kindly check PAS speed level on LCD, whether it is not 0 (0 will turn off PAS and throttle)
4) Why my speed display is not correct
Please kindly check whether you have correct setting:
Correct wheel size setting: according to your wheel size
Correct max speed setting: set it at max value 99
Correct P1-P5 setting: P1=46,P2=0,P3=0,P4=0,P5=12
5) Why always cut off during riding
Please kindly check whether your battery support enough discharge current (Battery has enough capacity and Battery BMS board support max continuous discharge current at 40A)
Please check whether controller MOSFET is burned and short circuit
6) How can I active cruise function
If your controller connect LCD display, please don't plug the jumper on cruise connector: SM-2Y Female Black Connector with Black/Blue wires
Please set C7=1 from LCD, save and restart LCD
With hold throttle and keep definite speed not change, press "Down" key of LCD display Button 3 seconds at same time, cruise function is activated. Any other operation will cancel cruise function.
How to disable cruise function: To set C7=0 save and restart will disable cruise function again.
If your controller doesn't connect LCD display, please plug the jumper on cruise connector: SM-2Y Female Black Connector with Black/Blue wires
When hold throttle and keep definite speed not change about 3 seconds, cruise function is activated. Any other operation will cancel cruise function.
How to disable cruise function
Please turn on power
Please remove cruise plug (small black plug of Black/Blue wires)
Turn off power
Turn on power again
7) Why after turn on, LCD show "03_Info"
This is because of hall sensor abnormal, and most time is because hall sensor wires connection doesn't contact well, please kindly check the 5-wire hall sensor connector and also inside whether any pin bent doesn't contact well. If use quick release wire, please kindly check whether connector plugged very tight. If every connection is ok, then the most possible reason is hall sensor burned. (Very important: during installation, if need to remove the white hall sensor plug, please don't let hall sensor connector terminal touch phase connector terminal, otherwise hall sensor is very easy to be burned)
8) LCD C4 setting
C4=0: PAS 0 level will turn off both PAS and Throttle, PAS 1-5 speed level only valid for PAS but not for Throttle
C4=3: PAS 0 level will turn off only PAS, Throttle still work, PAS 1-5 speed level only valid for PAS but not for Throttle
C4=4: PAS 0 level will turn off both PAS and Throttle, PAS 1-5 speed level is valid for both PAS and Throttle
9) How to activate Regenerative Function
Set C13=1 from LCD, save and restart LCD. During braking, battery will be charged back.
10) Which battery shall choose
You can choose 36V/48V Battery (full charged voltage shall be maximal 43.8/58.4V), Battery capacity best should be more than 15AH, battery and battery BMS board must support max continuous discharge current at 40A, otherwise battery will always cut off!